


(iStock)
Today’s cars, with their specialized electronics, computerized internal controls, and long-life fluids, offer fewer and fewer opportunities for do-it-yourselfers to roll up their sleeves. It’s a mixed blessing. Cars need much less maintenance than they did in the good old days, and they last longer than ever. But some services that used to be routine now require the attention and tools of a highly trained specialist. Still, there are plenty of tasks that can keep a weekend mechanic busy for hours, and save you a few bucks in the process.
Go by the book. Your owner’s manual is the court of first resort for maintenance schedules and specifications for fluids, tires, lightbulbs, fuses, and other parts. It’s vital to follow the manufacturer’s recommendations. Using the wrong transmission fluid, for example, could wreck the gearbox and void the powertrain warranty.
Go buy the book. For moderately ambitious tasks, get hold of a detailed repair manual, such as those from Bentley, Chilton, or Haynes. The books show how the myriad components assemble and disassemble, and they explain how to perform basic maintenance and repairs, and typically troubleshoot, too. They generally cost $15 to $30 at auto-parts stores or online, and even if you use the manual only once, it will probably pay for itself.
Search the Net. Google your car’s make, model, year, and area of interest (e.g. “2002 Ford Focus headlight replacement”). Such a search can turn up helpful tips and videos from mechanics, owner’s forums, and even the carmaker. But always be mindful of the source.
More From Consumer Reports
Watch the video. YouTube and other online portals have step-by-step videos illustrating repair processes on countless cars submitted by fellow consumers and professionals.
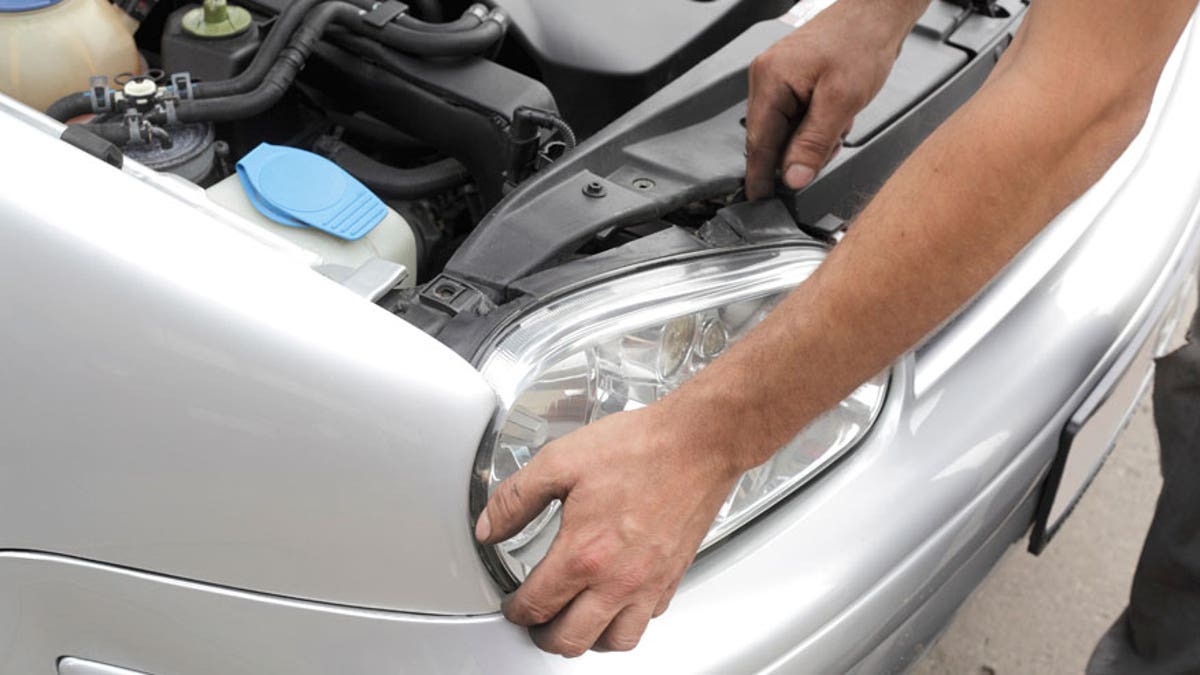
- Treating hazy headlight lenses. Modern headlight assemblies usually have clear plastic covers that can become hazy over the years from exposure to the elements. To save the expense of changing the whole headlight reflector assembly, you can use a restoration kit, usually consisting of abrasive cloths and a special finishing liquid. Some kits are applied with elbow grease, and others call for an electric drill. We tested a few, costing from $9 to $21. We found they all made a notable improvement, but some were better than others.
- Windshield wipers. You can extend the life of wiper blades by keeping them clean. Wipe off the rubber edge with a paper towel moistened with either glass cleaner or water and a little dish soap. It’s a good practice to clean the windshield and the wipers whenever you fill up with gas. And don’t use the wipers to clear ice from the windshield. Doing that quickly damages the rubber edges. Instead, use an ice scraper and the car’s defroster. Wiper blades don’t last long. In our tests we’ve found that six months is about the best you can expect a set of wiper blades to stay in top form. (See our windshield wiper buying advice and Ratings.) Be prepared to get new blade assemblies every spring and fall, or as soon as you notice consistent streaking. And if you’re changing one, you might as well change both, because they are subjected to the same aging factors. Auto-parts and big-box stores sell replacement blades, which cost $6 to $20 each. Some cars use unique blades that aren’t widely stocked, so you may have to go to the dealer’s service department. Blade assemblies usually just snap on and off the wiper arm, requiring no more than a flat-bladed screwdriver, if that. But some can be tricky, and it’s helpful to have someone with experience walk you through it the first time. Easier still: Many auto-parts stores will install the blades they sell free of charge.
- Wash and wax your car. Giving your car a good cleaning helps preserve the paint by removing road grime and residues that can eat through the finish. The time spent hand-washing a car gives you a close-up view of every body panel, so you can spot scratches, chips, and dings you may not have otherwise noticed. First wash the car with a cleaning solution designed for automotive finishes, working your way down from the top. To maintain a quality shine, periodically apply car wax. A spray wax is best suited to weekly or special-occasion applications. Other waxes can be used less frequently, every two to three months. (See our car wax buying advice and Ratings.) We’ve found that paste waxes hold up no better than liquid waxes, which are easier to apply. But none of the waxes we’ve tested held up for more than a few months at best. We’ve also found that microfiber cloths work better than old T-shirts, terry towels, or cotton rags.
- Stain treatment. Pet-stain removal products can do a good job getting food, beverage, and other stains off cloth upholstery and carpeting. Key rules to follow:• The quicker you treat a stain, the better.• Blotting is better than rubbing.• Use cold water instead of hot, which can set a stain.• Test any cleaning product first on an inconspicuous area to make sure it doesn’t affect the upholstery’s color.• Spray bottles are just as easy to use and are less costly than aerosols.• Use Scotch Guard or a similar product to make stain removal easier later on.
- Dent removal. To avoid the cost of a body shop or even a less costly "paintless dent removal" specialist, you may want to try a do-it-yourself dent-removal kit. Those kits, available through infomercials and online, usually cost about $20 to $30. Essentially, they work by hot-gluing a suction cup onto the dent and then pulling the dent out with a special tool. Those we’ve tried made some improvements, but the results weren’t perfect. Two we tested were Ding King and DentOut. Generally, the more experience you have, the better the results. You have to be careful with the hot glue, and you should avoid pulling the metal out too far. Small dents less than 1 inch in diameter were the toughest to fix. The kits worked best on dents about 4 inches across.
- Lightbulbs. Changing some lightbulbs (called a lamp in industry parlance) isn’t difficult—most these days have a twist-and-pull bayonet base or simply pull out and push in. Bulb specifications are usually found in the owner’s manual. However, accessing a bulb can be a real chore. Consult a service manual or look online if access to the bulb isn’t obvious. Sometimes it can be beyond the skills of a do-it-yourselfer. Accessing a fog-light lamp, for example, may require removing the car’s front bumper. Auto-parts stores and your dealer carry good selections of replacement bulbs, but you may find the common bulbs at your local hardware store. Makers of some replacement halogen headlight bulbs claim they are brighter and reach farther than the original equipment. They may possibly be more intense, but the distance thrown by the beam is much more dependent on the headlight’s reflector design than it is on the bulb. When installing a halogen headlight bulb, take care not to touch the glass with your bare fingers. Skin oils on the quartz glass are said to shorten its life.
- Coolant. You should have the coolant changed at the interval specified in the owner’s manual. If you need to top up between changes, add coolant to the coolant reservoir usually found near the radiator. You can buy coolant at a service garage, or auto-parts or big-box store. Sometimes it’s premixed, and sometimes it comes in a concentrated form that you mix yourself using distilled water. A 50/50 mix is standard. Just make sure to get the proper coolant, which should be listed in your owner’s manual. Checking to see whether the coolant is still properly resistant to freezing is a simple procedure. You’ll need a coolant tester, but they’re cheap—as little as $3 at an auto-parts store. The tester lets you suck a small sample from the coolant reservoir and then read on its gauge the temperature at which the sample will freeze. In most of the northern U.S., the coolant should stay liquid down to -30° F. Actually changing the coolant yourself may not be worth the hassle. You need a safe way to dispose of the discarded fluid, and doing the job right involves flushing the whole cooling system, which creates gallons of contaminated wastewater.
- Weather-strip. The rubber weather stripping used to seal doors can come loose if the clips fail, or it can deteriorate with age. If the rubber is in good shape and the clips are present, you can reattach it just by pushing the clips back in place. You may be able to get replacement clips from your dealer’s service department. You can also try gluing it back in place with a special-purpose weather-strip adhesive available at auto-parts stores for about $10 a tube.
- Fuses. Any of a modern car’s many electrical subsystems can stop working if a fuse blows. The owner’s manual tells you where to find the fuse panel and provides a diagram telling which fuse controls what. There’s usually a fuse-puller tool, like a small clothes peg, inside the fuse-panel door. Always replace a blown fuse with one of the same amp rating, as specified in the owner’s manual. In other words, don’t replace a 10-amp fuse with a 20-amp fuse. That could cause a fire. Note that fuses usually blow only if something has overloaded the circuit. So a blown fuse can signal something more serious, such as an electrical fault, that will require a professional to remedy.
- Touch-up paint. Touching up paint flaws early can save a heap of money down the road. You can touch up small scratches and chips with touch-up paint, available for a few dollars at your car dealership and at some auto-parts stores. Make sure you get an exact color match. Touch-up paint usually comes in a small bottle with an applicator brush in the lid. Otherwise, use a small, pointed artist’s brush and cover the scratch by going over it in tiny dabs. Let the paint dry for at least a day or two before polishing the car.
Copyright © 2005-2015 Consumers Union of U.S., Inc. No reproduction, in whole or in part, without written permission. Consumer Reports has no relationship with any advertisers on this site.