


backyard koi pond (M. Eric Honeycutt)
Waterfront property is pricey, but did you know there's a way you can create your own? That's right: All you need to know is how to build a pond in your yard. And unless the body of water you want is truly massive, this can definitely be a DIY project that most homeowners can do with a little elbow grease.
This easy outdoor improvement pays off in more ways than just better scenery: 29% of architects surveyed by the American Society of Landscape Architects predict that backyard ponds and streams will be popular landscaping elements in 2016. So if you've been pining for a pond, here's how (and where) to dig in.
Pick your pond spot
Before you settle on a location for your new pond, call 811, a government service that helps homeowners avoid cutting utility lines as they dig holes on their property. After you call, your local utility companies will send locators to your home to mark the location of buried lines so you can steer clear.
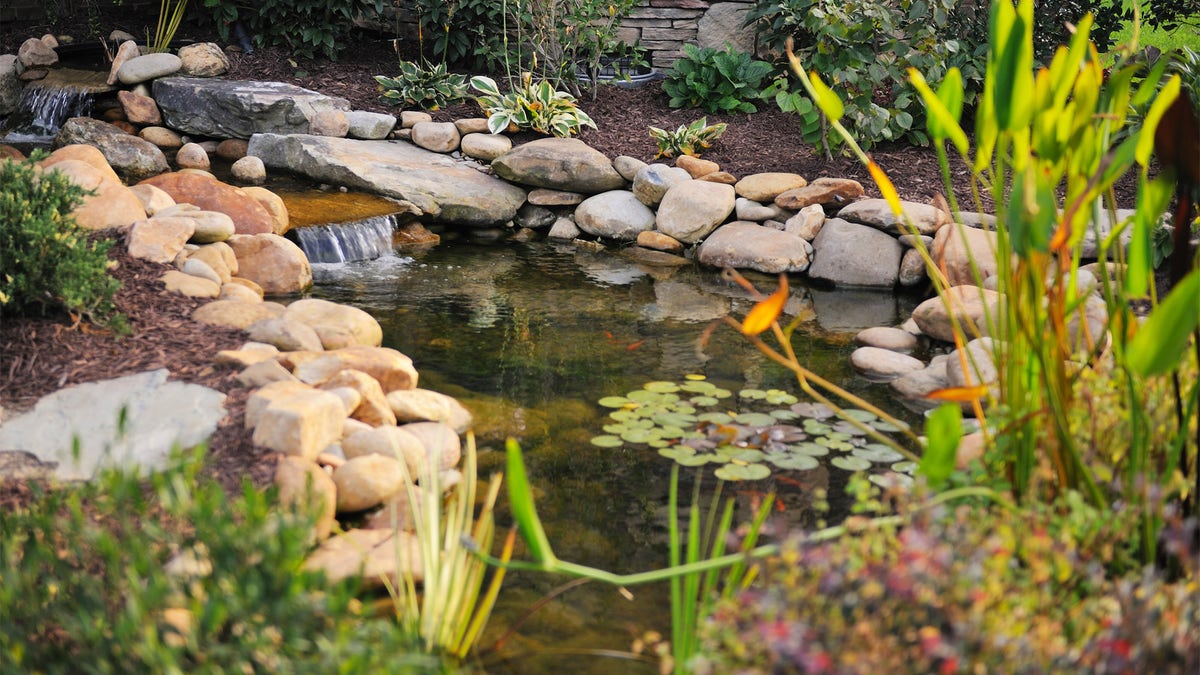
Place your pond, ideally, where you'll see it from either a window or patio/deck, so you can enjoy your new view. You will also want to choose an area that's fairly level so your pond will look full all the way around, rather than half-full on one side. And make sure the pond is within reach of a grounded exterior outlet, where you'll plug in your pump, filter, and an outdoor spigot that will replenish evaporating water.
Pick the right pump
To prevent water from stagnating and mosquitoes from breeding in your pond and spreading illnesses like the Zika virus, you'll need a pump that's strong enough to circulate your pond's water at least every two hours. Pumps are rated by gallons per hour, so if your pond contains 1,000 gallons, your pump should be rated at least 500 gph. Pumps can also push water to added features like waterfalls. One way to tell if your pump's strong enough is if you can see the surface water moving constantly.
Dig the hole
Lay out the shape of the pond with a rope or landscaping paint. Then dig out the pond using a shovel or spade. According to Ashley Spangler-Dobb at Smartpond, which manufactures ponds, pumps, and filters, your pond should be at least 18 inches deep, or at least 4 feet deep if you're planning to keep fish, which need deeper areas to escape prey and survive winter. You will also need to dig a shallow trench to the nearest GFCI electrical outlet; this shelters the PVC conduit that will house your pump, filter, and light cords.
Once the hole is dug, spread an inch-thick layer of sand over the bottom of the hole, then top that with an underlayment like carpet or landscaping fabric, which protects the pond liner from roots and rocks that can cause leaks.
Lay down a liner
Now it's time to add a pond liner, which captures the water in a reservoir and prevents it from soaking into the surrounding ground. Most liners for DIY ponds are black (it disappears from view when filled) and formed of either plastic or rubber. You can buy them at big-box hardware stores or online. A 1,000-gallon PVC liner costs about $140; a same-size rubber liner costs about $190.
Center the pond liner so at least 1 foot of excess overlaps the edges.That's where you'll put rocks and plants that will hide the liner for a more natural look. Press the liner into the hole, then fill the center with water to secure it in place. Next, hook up the pump (it's best to consult an electrician to ensure safe installation), but don't turn it on until you've filled your pond with water from your garden hose. Once your pond is filled, kick back and enjoy your new waterfront view!