


Renters are often limited in what they can do to their units. Landlords might forbid making any major changes, and since it’s a temporary space, renters don’t want to invest in a major project that they can’t take with them when they move. But if you’re a renter and want to upgrade your living space a little, here are a few DIY projects that are perfect for apartment dwellers.
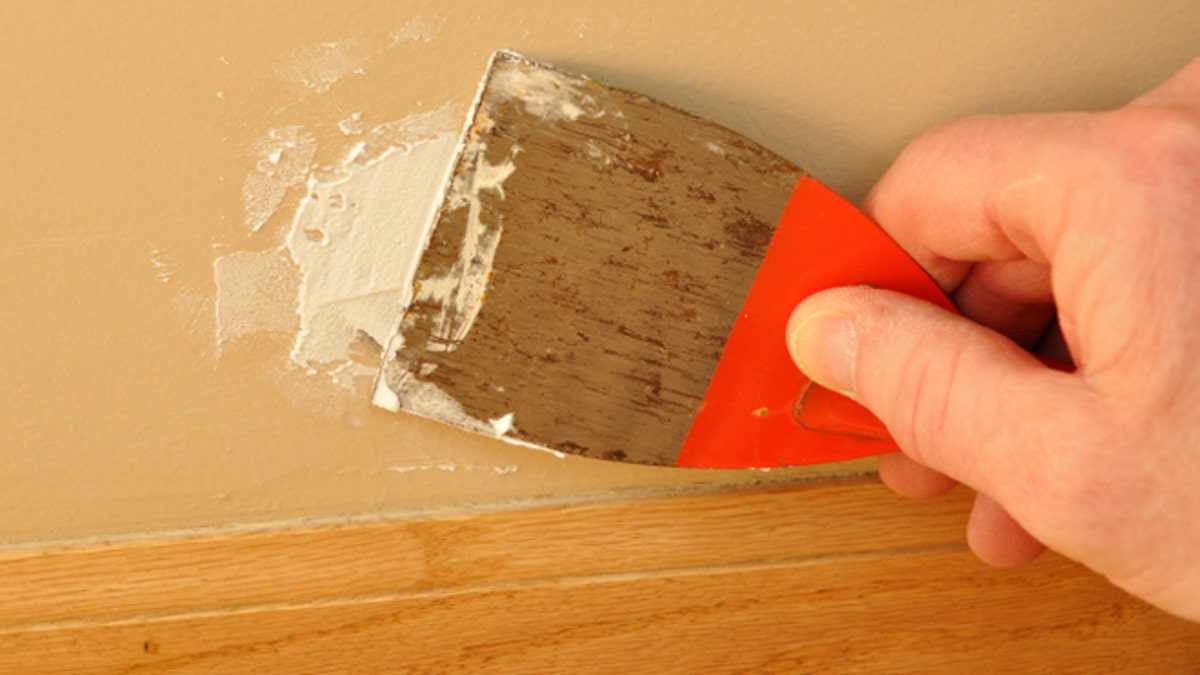
Don’t Be Afraid to Re-patch Your Walls
Many renters are loathe to install shelving or even put up pictures, lest they lose their damage deposits. But the fear of nails and screws piercing the drywall is completely unfounded, and re-patching a wall before you move out is actually fairly straightforward DIY project.
For small holes, the sort made by tacks and nails, all you need is a bit of spackle, a putty knife and a little paint. Fill the hole with the spackle and then use the putty knife to smooth it out. If the patched section isn’t totally flat when it dries, just smooth it out with a bit of sandpaper. Finally, cover up the white spot with a bit of paint. Matching the paint color is easy if you have a leftover can from the last time the wall was painted, but if you don’t, you can use an app like Benjamin Moore’s Color Capture app to match the paint color.
For larger holes, you can use a self-adhesive drywall repair patch, which you can pick up at any hardware store. Stick the patch on the wall and cover it with joint compound using a large putty knife. Once the compound is dry, sand it until it is smooth and then repaint.
Refinish Your Furniture
You probably can’t refinish your beat-up hardwood floors in your apartment or give your kitchen cabinets a makeover, but there’s no reason you can’t give your own furniture a second life. If you have wood furniture with a faded finish, you can make it look like new in the span of a weekend.
Use a paintbrush to apply a generous layer of paint remover to the furniture, let it sit for 15 minutes and then remove it with a plastic scraper or a bit of steel wool. Because paint remover is pretty harsh stuff, be sure to wear rubber gloves while you do this and always work in a well-ventilated area. Once you’ve taken off the old finish, you’ll want to get down to bare wood by sanding first with 180-grit sandpaper, and then a second sanding with finer 220-grit to give it a smooth finish. Give the wood a little color with a coat of wood stain, and then make it shine with a few coats of polyurethane finish, which will also protect the wood from moisture.
Upgrades You Can Take With You
You don’t want to invest time and money on home improvements that you’ll have to leave behind when you move out. But there are many upgrades you can make around your apartment that you can easily bring with you to the next place. You can start by replacing that crusty old low-flow shower head with a fancier model. Simply unscrew the old shower head, wrap a few layers of plumber’s tape around the threads on the pipe, and then screw on the new one.
You can replace other sorts of fixtures as well, including doorknobs, light switch plates and even an old, outmoded thermostat — an upgrade that can save you money if you pay for your own utilities. With anything you upgrade, make sure you keep the original hardware and that you store it in a place where you won’t lose it so that you can easily replace it when you move out.
Build a Vertical Garden
Most rentals lack the space for a full-size garden, but you can take advantage of the space you have by building a vertical garden. If you have a little outdoor space, you can purchase a fence mounted planter like the GroVert Vertical Garden. These plastic panels easily screw on to any flat surface and feature little compartments that hold your plants in place. If you want to add a vertical garden indoors, check out Wooly Pocket. These fabric pockets feature a military-grade moisture barrier, making them safe for indoor use.