(iStock)
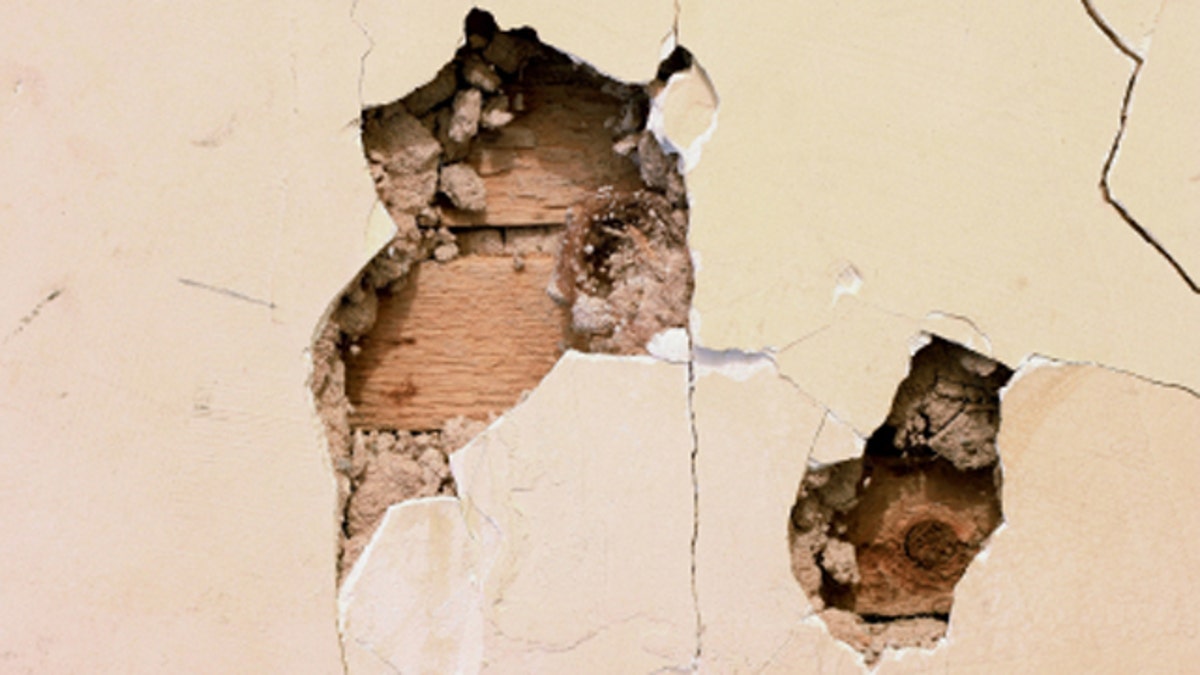
Everyone at one time or another will be faced with damaged drywall that needs repair. Whether it is because a well intended friend helping you move furniture drives the corner of a dresser through the wall, or one of the kids makes a gash with an out of control toy, drywall damage is a part of life.
In the face of these, or a hundred other drywall damaging events, acquiring the skills to repair minor damage in drywall is a necessity and quite an easy task for any homeowner.
If you are working on a larger remodeling project and have replaced more than one full sheet of drywall you should call in a professional to finish the seams. The process of taping and spackling the seams between sheets of drywall is an art. A professional will make the seams disappear in minutes while the beginner can find themselves covered in drywall compound and in over their head.
Some pros charge by the sheet while others will make an assessment of the work needed and quote a flat price for the job. Either way, get three estimates and be sure that everything is put in writing before the work begins. The contract should spell out how many coats of spackle he plans on applying and when he will be returning to finish each coat. He will have to come back multiple times because taping drywall joints is done in layers, typically three, and you have to wait for each layer to dry before applying the next. Plus, you’ll want the pro to do the sanding too, so this can add up to four trips back to your house.
The smaller holes, dings, or other damage can be fixed by anyone in a few hours.
The materials for this type of repair are inexpensive and include joint compound, drywall screws, drywall tape or mesh, a sanding sponge, and a small piece of drywall if you have a larger hole to fix. There are also peel-and-stick patches which can be used for smaller holes and they make repairs extremely easy.
Joint compound can be purchased premixed and resembles mashed potatoes. For almost every diy project the premixed stuff is all you’ll need. There is “all purpose joint compound” which is thicker and takes longer to dry, and “lightweight compound which isn’t quite as thick and dries a little faster. Lightweight is great for small repairs.
Drywall is made of gypsum plaster sandwiched between two thick sheets of paper and it breaks very easily. It comes in different thicknesses from one quarter of an inch to a half inch to one inch. Be sure to check the thickness of the area you are repairing and get the same thickness. The wrong stuff will leave you with a big bump or divot in your wall.
Cutting drywall is simple, all you need to do is cut through the paper on one side of the board and snap the inner gypsum core. It will break cleanly, almost every time, and then you cut the other side of the paper.
Aside from basic tools such as a hammer, knife, and screw gun, you’ll also need a spackle knife. Grab one that is at least four to six inches wide because working with those skinny plastic putty knives will be a nightmare.
Repairing a small hole, like the ones left behind from picture hangers, is a breeze. Any paper or drywall chunks should be cut out with a utility knife so they don’t stick up through your finished work. Using the spackle knife, spread the joint compound over the hole, let it dry, and then lightly sand it smooth. Once you get good at it you’ll be able to “skim” over the hole leaving only the desired amount of compound in the hole with no excess. After the compound dries lightly sand it down for a smooth finish.
Fixing nail pops in a wall is just as easy except you need one extra step. Simply hammering the nail back into the wall will not prevent it from popping again. You need to drive a screw approximately two inches away from the nail pop to hold the drywall against the wall’s framing. Remove the loose nail if possible, if not drive it back in with a hammer and skim over the hole with the joint compound.
For larger holes up to a few inches across the peel and stick patches work great. They are made with a stiff metal backer covered with an adhesive mesh and only cost a few dollars. They come in different sizes so measure your damaged area and get the size that is slightly larger. To use them you simply peel the wax paper off the patch and the mesh will stick to the wall. The toughest part of the process is spreading an even coat of joint compound over the patch. You will need to put a few coats of compound over the patch letting each layer dry before applying the next.
Be patient when applying joint compound. You will find it takes a little practice before you get an even coat in one swipe. You want each layer to be as smooth as possible, but keep in mind that this stuff is very forgiving. You’ll be sanding it later so don’t stress out. You can always skim another layer over your work if you find imperfections after sanding. A popular technique for small fixes is to use a damp sponge to smooth out the repair area, sometimes instead of sanding, to eliminate all the dust.
Holes that can’t be covered with a peel and stick patch require a bit more work. An extra piece of drywall may be needed to fill the hole. But in order for the piece of drywall to stay in place and not fall through the hole, small strips of wood are used as a backer.
The basic idea is to cut the strips a little longer than the hole you’re trying to fix and place them in the hole against the back of the wall board. The strips should be long enough so that you can attach them with screws from the front. If you put a screw too close to the edge of the drywall you will crack it or cause it to break so stay at least an inch away from the edge. Cut a patch of drywall the same size as your hole and secure it in place by screwing it to the backer boards you just put in. The key to putting screws into drywall is to drive the screw just far enough so that it is slightly recessed into the drywall without breaking the paper facing.
Mesh tape, which is tacky and sticks to the wall, is placed on the seams. Some pros choose to use paper tape to cover the seams, but a beginner will find the mesh easier to use because it won’t slide around as much as the paper. Several light coats of compound are applied over the mesh allowing each layer to dry before skimming on the next. Once you’ve put on two or three coats, lightly sand or sponge down the dried compound to make a smooth flush surface.
These are the basic techniques for repairing drywall. As always, I recommend grabbing a good “how-to” book for a more in depth explanation on the process and for tips and tricks that will prove to be extremely useful.
So, when that friend who is helping you move furniture drives the corner of the dresser through the wall there is no need to have a panic attack. You now know it is an easy fix.
Jason Gurskis is a licensed home improvement contractor based in Mystic Island, New Jersey dedicated to making homes more comfortable, durable, and energy efficient.